
Escape the Ruins
UX/UI Game Design
Designed the UX/UI and levels for a short puzzle game, refining the game's interface, mechanics, and puzzles through iteration.

Role
-
UX/UI Designer
-
UX Researcher
-
Level Designer
- Solo Project
Timeline
-
May - Aug 2024
Tools
-
Figma
-
Unity
-
PixilArt
Process
-
Discover
-
Define
-
Develop
-
Deliver
-
Reflection
Project Overview
Escape the Ruins is my first solo project, developed as a personal challenge to apply and refine my skills in UX/UI and Level Design.
Problem
The game needed to guide players without taking away from exploration.
Since exploration is a big part of Escape the Ruins, I had to make navigation, combat, puzzles, and UI clear while still letting players discover things for themselves.
Design Question
How can I guide players through exploration, combat, and puzzles without taking away from discovery?
Project Goals
-
Connect UX and level design to create clear navigation and player guidance
-
Use playtesting and feedback to improve the experience through iteration
-
Keep exploration rewarding without giving players too much direction
Discover
Competitive Research & Analysis
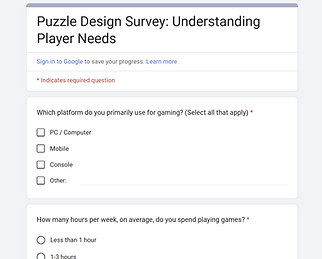
I wanted to understand what makes puzzle games feel fun, challenging, and rewarding to players.
I surveyed 26 participants to learn more about their preferences, frustrations, and expectations. Their feedback helped shape the puzzle difficulty, pacing, and overall experience in Escape the Ruins.

4 Competitors - The Legend of Zelda: A Link to the Past, 50 Tiny Room Escape, Fez, and The Room
I studied four similar games to see how they handled puzzles, exploration, and player guidance.
This helped me understand what made their experiences clear and engaging, while giving me ideas for how to shape Escape the Ruins.

Define
Creating Personas
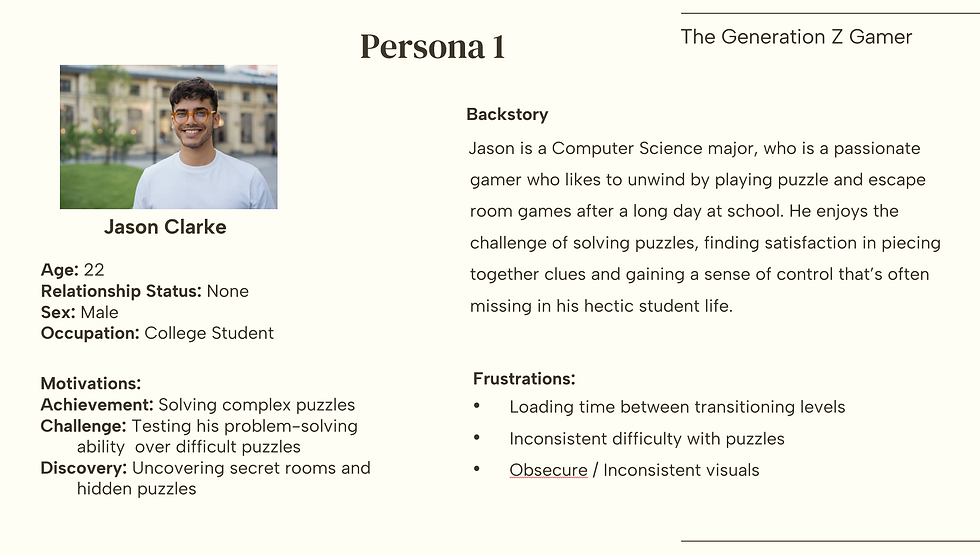
The survey revealed different player needs, preferences, and approaches to puzzle games.
I grouped these patterns into three personas that represented key parts of my target audience. Each persona helped me think through what players might need from the puzzles, navigation, difficulty, and guidance, giving me a clearer direction for later design decisions.


Develop
Low-Fidelity Wireframes, Early Prototype, and User Testing
I created basic wireframes to establish the essential UI players would need during gameplay.
I focused on the main screens such as options, inventory, and pause menu. I also referred back to my survey results to make sure the UI matched player expectations before moving into the final design.
These are the wireframes I created, based off of that information:
-
Start Menu
-
Pause Menu
-
Options Menu
-
Sound Effects
-
Music
-
Screen Resolution
-
Toggle Full Screen
4. Head-Up-Display (HUD)
-
Pause Button
-
Inventory (Hotbar)


Early Prototypes
I created basic wireframes to establish the essential UI players would need during gameplay.
I focused on the main screens such as options, inventory, and pause menu. I also referred back to my survey results to make sure the UI matched player expectations before moving into the final design.
Game Mechanics
Rotating Benches
I used animation to show which way the rotating benches can move. This makes it easier for players to understand which direction each bench is facing.
Push Crates onto Pressure Plates
I made the crate puzzle easier to understand by visually connecting the crates to the pressure plates. This helps players quickly see how the two objects work together.
Interacting with Objects

I used camera movement, visual cues, and sound to show when objects can be interacted with. This gives players clear feedback and helps guide them through the environment.
Player Onboarding
The onboarding starts as soon as the player enters the game, using floating text prompts to introduce basic controls like WASD movement.
As players approach interactable objects, new prompts appear to show when they can press E to interact. These prompts disappear when the player moves away and return when they come back, giving players a simple reminder without keeping instructions on screen at all times.
User Testing
I created basic wireframes to establish the essential UI players would need during gameplay.
I focused on the main screens such as options, inventory, and pause menu. I also referred back to my survey results to make sure the UI matched player expectations before moving into the final design.


Deliver
UI and Final Prototypes
I developed the early wireframes into a fully playable prototype, bringing the UI and level design together into one experience.
For the final UI, I chose a dark purple that worked well against the green environment and helped the interface stand apart from the level without distracting from gameplay. I kept the layout simple and used clear contrast so important information, buttons, and icons were easy to see.
The main HUD also tracks the player’s overall progress. Players must collect four runes to complete the game, with one rune found in each level. Each hotbar slot represents a different rune (lights up when collected), making it easy for players to see what they have collected and what is still missing.
From there, I designed each room around a different puzzle, mechanic, and rune for the player to discover.
Level Design
Room 1
Planning/Overhead Map

The overhead map of the first room shows how I used the layout to guide players while still giving them space to explore.
It includes tutorial triggers and key interactable objects such as pressure plates, crates, pillars, a door, and a chest. Each element was placed to support the puzzle flow and help players understand where to go next.
Prototype/Final

Room 1 introduces the game’s core interactions through simple, contextual prompts.
Players learn basic movement and how to interact with objects as they explore the room. The puzzle then teaches them to push objects using E, rewarding them with a rune, raising the pillar, and opening the path to the next area.
Room 2
Planning/Overhead Map

Room 2 centers on two benches, with clear annotations for stair direction and key objects. The layout gives players space to interact with the environment while maintaining smooth movement and setting up the next puzzle.
Prototype/Final

In this room, players learn to rotate two benches to solve the puzzle, with a hint in the top-left to guide them. Completing it rewards a rune and unlocks the path to Room 3.
Room 3
Planning/Overhead Map

The overhead map of Room 3 shows how the puzzle combines pushing and rotating mechanics.
The layout guides players toward key areas, while the sign interaction connects each part of the puzzle and helps bring the room together.
Prototype/Final
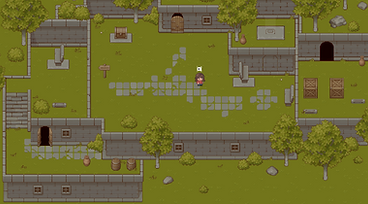
Room 3 combines earlier mechanics by using both bench rotation and crate pushing in the same puzzle.
Players interact with a sign to move a wall, revealing a second bench and a path downstairs.
From there, they enter a locked room and complete a crate puzzle to reach the next area. This introduces more steps and prepares players for the larger puzzle in Room 4.
Room 4
Planning/Overhead Map

This level builds on earlier mechanics like rotating benches and pushing crates, while making the puzzles a little more challenging.
The rooms connect back to a central area with the exit and rune altar, giving players a clear path while still leaving room to explore and solve each puzzle.
Prototype/Final

Room 4 combines the mechanics players learned earlier into one larger, multi-step puzzle.
Starting from a central area, players move through connected rooms, rotate benches, push crates, and find hidden interactions to reach the final rune.
What I Learned
This project helped me grow in both UX/UI and level design. I learned how important clear UI, visual cues, and level layout are when guiding players through a game.
For the puzzles, I focused on creating challenges that were easy to understand but still required players to explore and think. I also learned how to work through design problems and adjust my ideas when something was not working.
If I continued this project, I would start playtesting earlier so I could gather feedback sooner and have more time to improve the experience.